How to Install Artificial Grass
Artificial grass has become a go-to solution for homeowners and contractors looking to create beautiful, low-maintenance outdoor spaces. Its lush, evergreen appearance eliminates the need for mowing, watering, or reseeding, making it a practical choice for busy households and design-conscious outdoor projects. Whether you’re upgrading your garden or a client’s lawn, installing artificial grass is cost-effective and rewarding.
This guide will teach you how to lay artificial grass, from initial preparation to finishing touches, to provide a professional-quality result. Along the way, we’ll cover tips for common challenges, such as achieving proper drainage and joins, while highlighting mistakes to avoid. By the end, you’ll be equipped with the knowledge and confidence to turn your outdoor space into a stunning, durable oasis.
Preparing Your Outdoor Space

Preparing your outdoor space is a major first step in achieving a professional-quality artificial grass installation. Skipping this stage or cutting corners can lead to uneven surfaces, poor drainage, and a finish that doesn’t stand the test of time. Whether you’re working with soil, concrete, or decking, proper preparation gives you a stable and attractive result. We will also list the accessories needed to make this dream a reality.
Why Preparation Matters
Taking the time to prepare your outdoor space is essential to creating a smooth, durable foundation for your artificial grass. A well-prepared base not only supports the grass and prevents wrinkles or dips but also makes sure of proper drainage, reducing the need for future adjustments. This initial effort will save you time and money by avoiding costly fixes later.
Tools and Materials Checklist
Before you begin, gather the following materials and tools:
-
Sand
-
Weed control fabric
-
Adhesive or jointing tape
-
Compactor or roller
-
Spirit level
-
Utility knife
-
Drainage rods (for water-prone areas)
-
Edging materials for clean borders
-
Zeolite infill for pet-friendly lawns
-
Geotextile membrane for concrete or decking
Step-by-Step Process for Preparation
-
Clear the Area: Remove all debris, plants, or turf. Dig 50–75mm deep for soil installations or thoroughly clean hard surfaces like concrete or decking to remove dirt, grease, or dust.
-
Level the Surface: Smooth soil by filling low spots with sand or sub-base material like MOT Type 1, and repair any cracks or raised areas on hard surfaces for a uniform base.
-
Plan for Drainage: Make sure soil slopes slightly for water runoff, installing a drainage layer if needed. On hard surfaces, drill drainage holes or use a shock pad underlay for proper water flow.
-
Lay Weed Control Fabric: Spread a high-quality weed membrane, overlapping edges by 10–15cm, and secure with pins or adhesive to block weed growth.
-
Compact the Base: Firmly compact soil or sub-base with a roller or compactor to create a stable foundation and minimise future shifting.
For pet-friendly spaces, incorporating a zeolite infill helps neutralise odours while providing a durable base suited for frequent use. On sloped areas, maintaining a consistent gradient when compacting the base is essential for mild inclines, while steeper slopes may require retaining boards or a level sub-base for stability. For installations on hard surfaces like concrete or decking, using a geotextile membrane improves drainage and protects the turf, providing a long-lasting, functional foundation.
By thoroughly preparing your outdoor space, you’re laying the groundwork for a smooth, long-lasting artificial grass installation.
Laying the Base for Artificial Grass

A well-prepared base is the foundation for a durable and visually appealing artificial grass installation. By taking the time to create a solid and stable foundation, you can prevent uneven surfaces, support proper drainage, and keep your grass looking pristine for years.
Materials Needed
-
Sub-base material (e.g., MOT Type 1 or crushed stone)
-
Sharp sand
-
Weed control fabric
-
Compactor or roller
Step-by-Step Process for Laying the Base
-
Spread the Sub-Base Material: Lay a 50–75mm layer of MOT Type 1 or crushed stone evenly over the cleared area to provide a strong foundation and promote drainage.
-
Compact the Sub-Base: Use a compactor or roller to press down the sub-base firmly, repeating as needed to provide a stable and level surface.
-
Add a Layer of Sharp Sand: Spread a 10–20mm layer of sharp sand over the compacted sub-base, levelling it with a straight edge or timber to create a smooth surface.
-
Compact the Sand Layer: Compact the sand layer thoroughly, filling in any dips or uneven spots to maintain a uniform level.
-
Lay the Weed Control Fabric: Roll out weed control fabric, overlapping edges by 10–15cm, and secure with pins or nails, trimming any excess material around the edges.
Tips for Specific Needs
-
Pet-Friendly Areas: Incorporate a layer of odour-absorbing material, such as zeolite infill, beneath the grass to neutralise smells in pet-frequented areas.
-
Drainage Issues: For areas prone to water pooling, use a drainage membrane beneath the sub-base to direct water away from the surface and prevent flooding.
Troubleshooting Common Issues
-
Uneven Base After Compacting: Add more sub-base material or sand to low spots and compact again until the surface feels uniform.
-
Handling Slopes: For minor slopes, compact the base with a consistent gradient. For steep inclines, install retaining boards to keep the base materials in place.
By following these steps, you’ll create a solid and level foundation, which means your artificial grass stays secure and maintains its appearance over time.
Installing the Artificial Grass

With the base prepared, it’s time to install the artificial grass. This step requires precision and attention to detail to provide a fantastic finish that looks natural and stays secure for years.
-
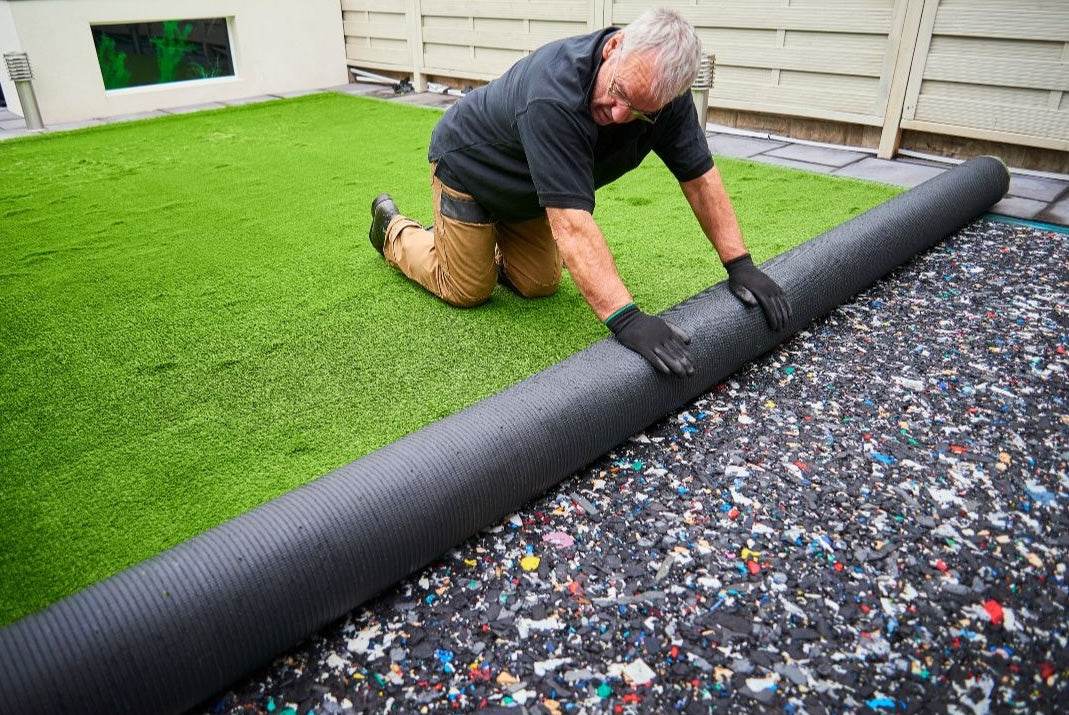
Unroll the Artificial Grass: Lay the grass on the prepared base and let it rest for 24–48 hours to relax the material and reduce wrinkles or creases.
-
Position the Grass: Arrange the turf with the pile direction facing the main viewing area, and make sure all sections match for a consistent, natural look.
-
Trim the Edges: Use a sharp utility knife to carefully trim the grass to fit your space, taking extra care around obstacles and irregular shapes for precision.
-
Join Sections: Align the edges of adjacent sections without gaps or overlaps, securing them with jointing tape and adhesive, and allow to cure fully.
-
Secure the Grass: Fix the perimeter using galvanised nails spaced 15cm apart for soil bases or apply outdoor-grade adhesive along the edges for hard surfaces.
When dealing with obstacles such as garden borders or stepping stones, trim the grass slightly larger than the feature and tuck it neatly under the edges to create a polished look. After securing the grass, use a stiff broom to brush the pile against the grain. This not only lifts the fibres, giving the lawn a natural appearance but also helps to conceal seams and joins. A final inspection from different angles is needed so that the grass is even and well-aligned; make adjustments to edges or seams as needed.
If seams are visible, lift the grass, realign the sections, and reapply the adhesive to achieve a connection. For wrinkles or air pockets, pull the grass taut and secure it with additional nails or adhesive. Brushing the pile again will lift the fibres, hiding any remaining imperfections and completing the installation with a professional-quality finish.
Securing and Finishing the Installation
Securing and finishing your artificial grass is the final step in the installation process. This stage locks everything in place, giving your lawn a polished, professional appearance while providing durability for years to come.
Step-by-Step Process for Securing the Grass
-
Fix the Edges: Secure the perimeter with galvanised nails spaced 15cm apart for soil-based installations or use outdoor adhesive in a zigzag pattern for hard surfaces, pressing firmly to bond.
-
Smooth the Surface: Use a stiff broom to brush the grass fibres, smoothing out wrinkles and air pockets while lifting the pile for a natural look.
-
Add Infill Materials: Spread and evenly distribute kiln-dried sand or rubber granules across the grass to add weight, stabilise the turf, and support the fibres.
-
Trim and Tidy Up: Trim edges neatly with a utility knife or scissors, checking seams to make sure they are tightly connected and free of gaps.
-
Final Inspection: Walk over the lawn to identify loose sections, brushing the pile against the grain to lift the fibres and achieve a polished finish.
Securing and finishing your artificial grass is the final step in the installation process. This stage locks everything in place, giving your lawn a polished, professional appearance while making sure of its durability for years to come.
Decorative edging, such as timber, stone, or metal borders, can frame the lawn and create a clear boundary, adding a refined touch to your installation. For areas near flower beds or pathways, these features not only increase the overall aesthetic but also tie together various elements of your outdoor design, creating a cohesive and visually appealing space.
If you encounter issues like edge lifting, reapply the adhesive or secure the grass with additional nails to reinforce the perimeter. For visible gaps in seams, lift the grass, realign the sections, and reapply the adhesive to provide a smooth finish. If bumps or uneven areas are noticeable, smooth out imperfections by redistributing the infill or securing the turf with extra nails. These adjustments, combined with careful finishing touches, will result in a durable and attractive artificial grass installation that improves your outdoor space while providing years of hassle-free enjoyment.
Maintenance Tips for Artificial Grass

Artificial grass requires minimal upkeep compared to natural lawns, but regular maintenance is essential to keep it looking vibrant and fresh. With just a few simple steps, you can preserve its appearance, extend its lifespan, and make sure it remains a standout feature of your outdoor space. A consistent cleaning routine helps remove debris such as leaves, twigs, and dirt that could affect drainage or create an untidy appearance. Below are a few tips to help you maintain your lawn:
-
Use a leaf blower, garden vacuum, or stiff broom, and clear the surface regularly to prevent build-up.
-
For a deeper clean, hose down the turf periodically to wash away dust and grime.
-
High-traffic areas may require more frequent rinsing, while less-used spaces can be cleaned less often.
-
Handling spills and stains quickly means your artificial grass remains spotless.
-
Everyday messes like food or drink spills can be cleaned with a mixture of warm water and mild detergent, followed by gentle scrubbing and thorough rinsing.
-
For tougher stains, such as grease or oil, a diluted household degreaser can be applied before rinsing.
-
Pet messes should be removed promptly, and the area can be freshened with a pet-friendly disinfectant or deodoriser.
-
During autumn and winter, remove fallen leaves to prevent them from decomposing and affecting the drainage system.
-
Allow snow and ice to melt naturally, as sharp tools or de-icers can damage the grass fibres.
-
In spring and summer, brushing the pile more frequently keeps the fibres upright and prevents matting, especially in high-traffic zones.
-
For long-term care, inspect the edges and seams periodically for signs of lifting or wear. Reapply adhesive or secure with nails as necessary to keep the grass firmly in place.
-
Over time, infill materials such as kiln-dried sand or rubber granules may settle or disperse, so topping them up when needed the turf remains stable and visually appealing.
-
Specific areas like pet-friendly lawns or play zones benefit from extra attention.
-
Zeolite infill or specialised cleaners can neutralise odours in areas frequented by pets. For play areas, check regularly for wear and tear, replacing sections if needed to maintain a safe surface.
-
These small efforts will keep your artificial grass fresh and inviting throughout the year.
By establishing a regular maintenance routine and addressing minor issues promptly, you’ll preserve the beauty and functionality of your artificial grass for years, enjoying a hassle-free outdoor solution that adds to your space.
Common Mistakes to Avoid
Installing artificial grass is straightforward but can go awry without careful planning. Skipping weed control fabric often results in weed growth disrupting the lawn's appearance—always lay a high-quality membrane before the base. Poorly compacted bases can cause uneven surfaces; take time to compact thoroughly, giving you a level foundation.
Adhesive mistakes are another common pitfall. Use galvanised nails for soil installations or outdoor-grade adhesives for hard surfaces. Match all grass sections in the same pile direction for a cohesive look.
Proper drainage is essential to prevent water pooling. Slightly slope the sub-base or incorporate drainage solutions like shock pads. Misaligned seams or gaps from improper section joining can detract from the finish; jointing tape and adhesive create clean, durable bonds.
Trimming grass edges too short or failing to whether it's suitable for pets can leave installations looking unfinished or lead to maintenance issues. Gradual trimming can give you a perfect fit, while zeolite infills and thoughtful drainage planning address odour control and hygiene concerns.
Address visible seams by realigning sections and reapplying adhesive. For bumps or wrinkles, pull the grass taut and secure it. Attention to detail and thorough preparation will provide a professional, durable artificial lawn.
By carefully planning each stage—preparing the base, laying the foundation, installing the grass, and securing the edges—you can achieve a clean, professional finish. Paying attention to details like drainage and alignment will provide lasting results. With regular care, your grass will stay vibrant and functional for years. Avoid common mistakes to save time and effort.
Ready to get started? Check out our collection of artificial grass and accessories to help you complete your project with ease.


